 github code is here!
The Blob Tracker is a simple demo that shows how you can track a certain color in OpenCV.
The setup consists of a camera mounted on a pan-tilt unit that’s wired to an Arduino. The camera and Arduino are hooked up to a computer via USB. On the computer, a simple Python script takes in the camera images, processes them using OpenCV, and sends back commands to the Arduino to move the pan-tilt servos and track the desired color.
Parts List and Assembly
This tutorial builds off the Remotely Controlled Pan-Tilt Unit post. Follow instructions there to assemble the unit, and upload the provided Arduino code to your Arduino.
If you’ve done things correctly, you should be able to view images from the camera on your computer (using any webcam software, like Skype or Google hangouts), and control the pan-tilt unit by plugging in your Arduino and sending commands over serial.
Installing OpenCV
In Linux, install OpenCV by running:
# run apt-cache search opencv-core first, to see which version is available. Anything greater than 2.2 should work

sudo apt-get install opencv-core2.4
Alternatively, you can install ROS, which comes with OpenCV.
Code
The code is available on Github at https://github.com/jessicaaustin/robotics-projects/tree/master/blob-tracker
Understanding color tracking
(Note: If you’re lazy and just want to track a color without understanding how it works, you can skip this section and pass in –red, –green, or –blue to blob-tracker.py below)
Most of the time, we think in terms of the RGB color model. However, when it comes to trying to track an object of a certain “color”, the RGB space is not very useful. That’s because something that’s “red” in one lighting condition might look like “dark red” in low light or “light red” in bright light.
An alternative is the HSV color model. HSV stands for Hue, Saturation, and Value. The hue is what we care about — for example, red — and the range we’ll look for here will be fairly narrow. Saturation and value will depend on the object’s texture and lighting conditions, and we can set those those values to a wider range to account for a wider range of texture and lighting conditions.
To illustrate this concept to yourself, try running the color_detector.py script in the blob-tracker folder:
# use --camera=N to set the index of your camera.

# e.g., if /dev/video1 is your camera device, then use --camera=1

./color_detector.py --camera=1
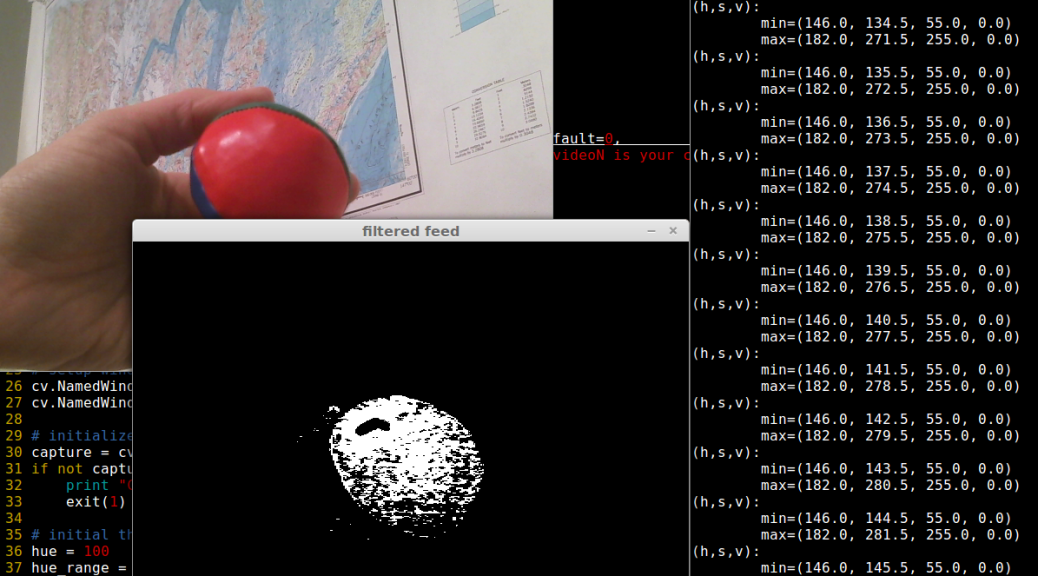
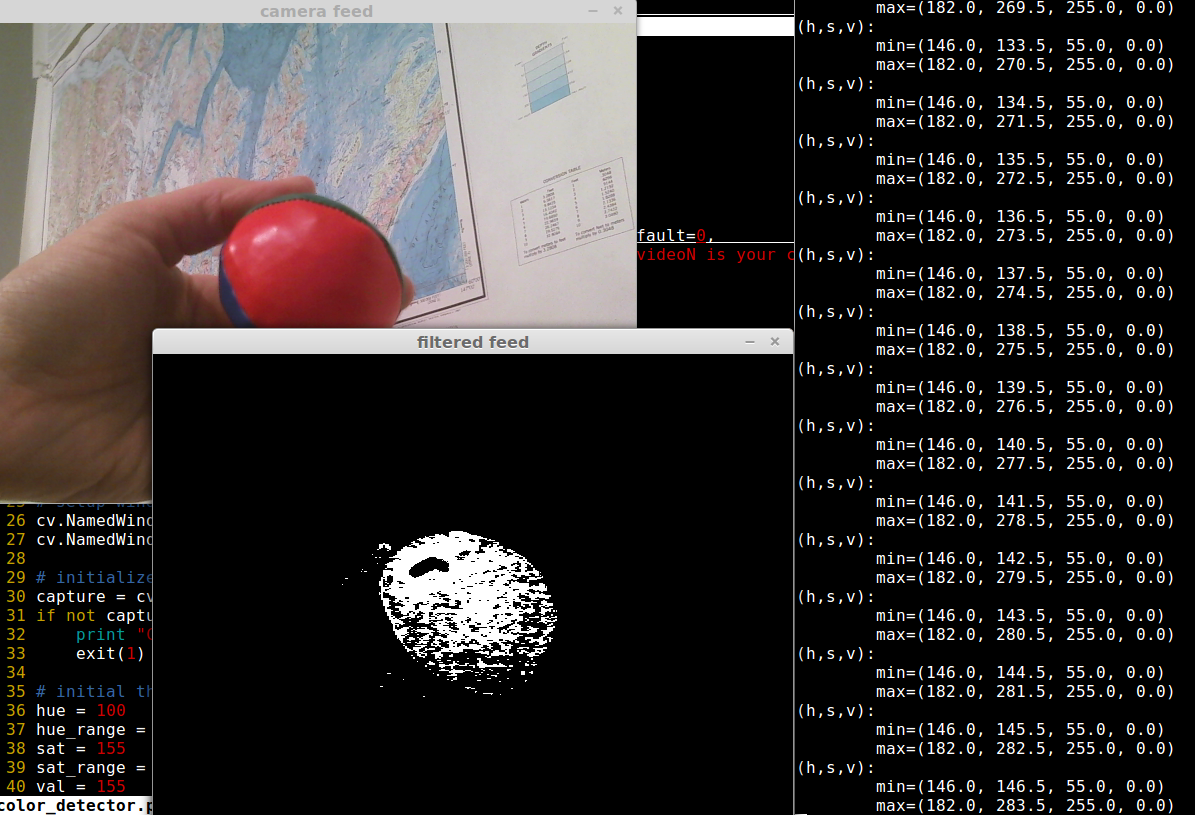
The program will pop up two windows: “camera feed” and “filtered feed”. The filtered feed is a mask where white is the color you’re tracking, and black is not.
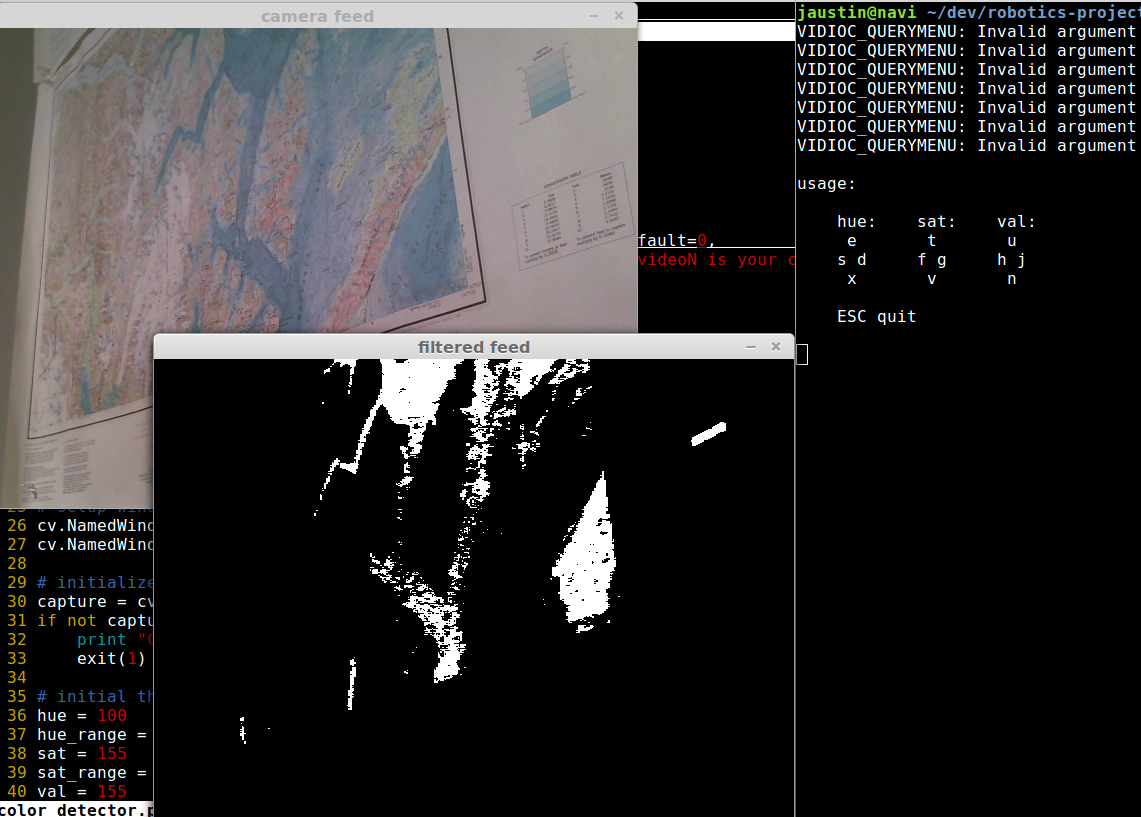
The program will start out with HSV set to the following values:

H = 100 +/- 50

S = 155 +/- 200

V = 155 +/- 200
Place a solid-color object in front of the camera — for example, a red ball — and use the keyboard to modify these ranges:
hue: sat: val:
 e    t    u
s d  f g  h j
 x    v    n
For example, to increase the max hue, press e, to decrease the min hue press x, to decrease the range press s, to increase the range press d. (If things aren’t working, make sure you have the window called “filtered feed” selected when you press the buttons).
Play with the values until you’re consistently seeing just the color you want, and not anything else (for example, a red jacket in the background).
Now try changing the lighting conditions. How does this change the track-ability? What if you modify the sat and val values?
The program will spit out the current HSV min/max ranges to the terminal. Once you’re happy with your ranges, hit ESC to exit and save the HSV values — you’ll need to input them into the blob-tracker program next.
For example, for tracking a red object I ended up with:
(h,s,v):

min=(146.0, 146.5, 55.0, 0.0)

max=(182.0, 283.5, 255.0, 0.0)
Running everything together
At this point you’ve got a camera to capture images, mounted on a pan-tilt unit that you can control over serial. You also have an HSV range to track. Now it’s just a matter of running the blob-tracker code! This code will process the images, find the color you want to track in the image, and send commands to the servos to close the loop and track the color.
To run:
# get options

./blob-tracker.py --help

# find a red object (no tracking), using a camera on /dev/video1 and an arduino on /dev/ttyACM0

./blob_tracker.py --camera=1 --red

# track a red object:

./blob_tracker.py --camera=1 --device=/dev/ttyACM0 --red --follow
First try without the –follow command. You should see two windows pop up: “camera” and “threshed”. The code performs some filtering on the image to reduce noise, so the color blob in the threshed image is “smooth”. A red circle on the camera shows where the center of the largest “blob” matching your color is located. If there is more than one “blob” of the same color in the image, the code will find the largest one and track it.
![]()
Now try running with the –follow command. Your pan-tit unit should move around the track the object!
![]()
![]()
![]()