All posts by Jessica

Electronic Dice

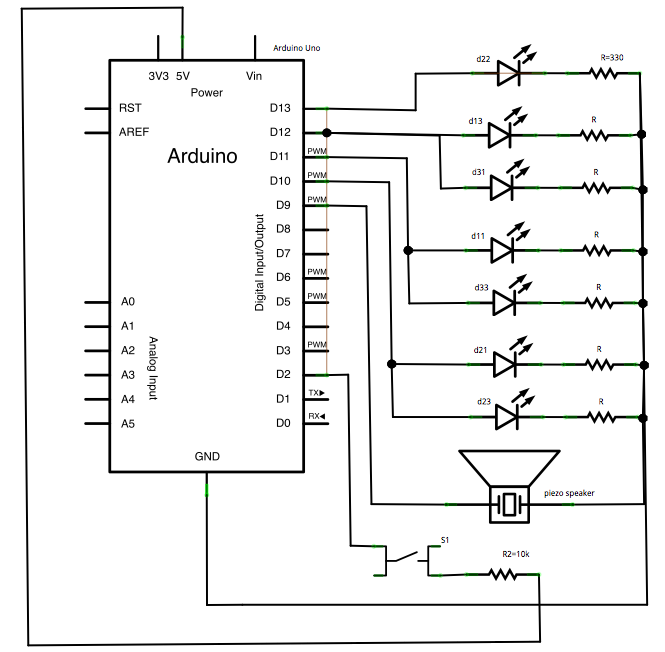
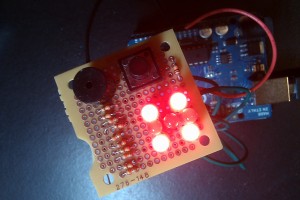
This weekend I worked on a fun little project: an “electronic die”. You press the button and it randomly cycles through possible die rolls, eventually “landing” on a number.

Video:

Schematic:

LED layout:

d11 d13
d21 d22 d23
d31 d33

Code:

int generatingNum = 0;

int buttonPin = 9;
int speakerPin = 2;

void setup() {
pinMode(buttonPin, INPUT);
pinMode(speakerPin, OUTPUT);

pinMode(13, OUTPUT); // 1
pinMode(12, OUTPUT); // 2
pinMode(11, OUTPUT); // 4a
pinMode(10, OUTPUT); // 6a
randomSeed(analogRead(0));

}

void loop() {
int buttonState = digitalRead(buttonPin);
if (buttonState == HIGH && generatingNum == 0) {
generateNum();
}
}

void generateNum() {
generatingNum = 1;
int currentNum = 0;
for (int i=5; i<=25; i++) { showNum(0); delay(100); int nextNum = (int)random(1, 7); while (nextNum == currentNum) { nextNum = (int)random(1, 7); } currentNum = nextNum; showNum(currentNum); double delayTime = (.5*i + i*i*i)/20; digitalWrite(speakerPin, HIGH); delay(delayTime); } generatingNum = 0; } void showNum(int num) { digitalWrite(13, LOW); digitalWrite(12, LOW); digitalWrite(11, LOW); digitalWrite(10, LOW); switch (num) { case 1: digitalWrite(13, HIGH); break; case 2: digitalWrite(12, HIGH); break; case 3: digitalWrite(13, HIGH); digitalWrite(12, HIGH); break; case 4: digitalWrite(12, HIGH); digitalWrite(11, HIGH); break; case 5: digitalWrite(13, HIGH); digitalWrite(12, HIGH); digitalWrite(11, HIGH); break; case 6: digitalWrite(12, HIGH); digitalWrite(11, HIGH); digitalWrite(10, HIGH); break; default: digitalWrite(speakerPin, LOW); break; } } [/sourcecode]
Miscellaneous XCode Troubleshooting

The worker for service class “(null)” cannot be instantiated.

When trying to upload an app to an ipad yesterday, I got the following message when trying to deploy:

The worker for service class “(null)” cannot be instantiated.

I’m running in XCode4, with Debugger options set to “None”.

By setting Debugger options to “GDB”, I was able to deploy to the device. I have no idea why this was happening.

Attempt to install on device fails due to restrictions

When attempting to install my app on an ipad, I was only able to run the app remotely. In other words, it wasn’t actually installing the app on the device, there was no “desktop” icon, and when I “stopped” the build, the app was killed on the ipad as well.

After wasting a bunch of time on this, I eventually realized that there were restrictions set up on the device so I couldn’t actually install my app (the debugger setting was a red herring, apparently). I removed those restrictions in the Settings menu:

General > Restrictions > Installing Apps > ON

and then I was able to install my app via XCode without any issues.

$50 Robot

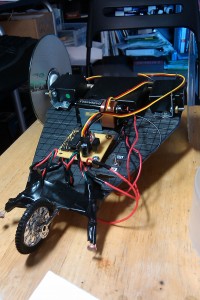
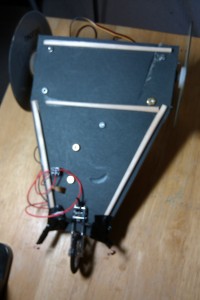
I couple of weeks ago I built a robot using the $50 Robot tutorial at Society of Robots. I want to thank the authors of the tutorial and the members at the forums for creating such a great resource for noobs like me. Building this robot was great fun, and I feel much more confident now about tackling simliar projects in the future.

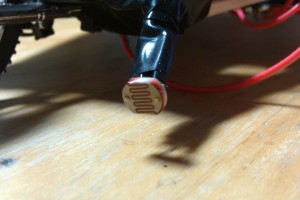
The robot’s programming is very simple: it goes right when the right sensor receives more light, it goes left when the left sensor receives more light, and goes straight when the sensor input is equal.

Here’s a close-up of one of the sensors:

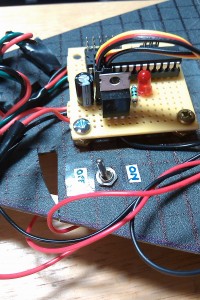
The wheels are powered by servos, which run off a set of 4 AA batteries. The board is powered by a 9V battery which is run through a 5V linear regulator to provide a steady 5V to the AT-Mega8 microcontroller. The tutorial suggests buying a battery holder with an on/off switch, which I did, but since I was using two separate power sources I decided to wire in my own on/off switch for the whole circuit.

For the “chassis” I used an old, somewhat flexible plastic cutting board. It was convenient because I could cut it and poke holes into it easily. Since the plastic was so flimsy, I glued chopsticks on the bottom of the robot for support. I highly recommend buying a big pack of wooden chopsticks from the grocery store–it’s like the poor man’s balsa wood.

Here’s a video of the robot in action. As you can see, the wheels don’t always provide the best traction, but hey, it works!

Hudson Perforce Plugin error: no output for command

Last night, we restarted one of our Hudson nodes and started getting the following error when trying to run a Perforce build:
Started by user vaustje
Building remotely on node4
Using remote perforce client: SOME_CLIENT
Caught exception communicating with perforce. No output for: p4 workspace -o SOME_CLIENT
com.tek42.perforce.PerforceException: No output for: p4 workspace -o SOME_CLIENT
at com.tek42.perforce.parse.AbstractPerforceTemplate.getPerforceResponse(AbstractPerforceTemplate.java:314)
at com.tek42.perforce.parse.Workspaces.getWorkspace(Workspaces.java:53)
at hudson.plugins.perforce.PerforceSCM.getPerforceWorkspace(PerforceSCM.java:671)
at hudson.plugins.perforce.PerforceSCM.checkout(PerforceSCM.java:294)
at hudson.model.AbstractProject.checkout(AbstractProject.java:1003)
at hudson.model.AbstractBuild$AbstractRunner.checkout(AbstractBuild.java:428)
at hudson.model.AbstractBuild$AbstractRunner.run(AbstractBuild.java:376)
at hudson.model.Run.run(Run.java:1174)
at hudson.maven.MavenModuleSetBuild.run(MavenModuleSetBuild.java:303)
at hudson.model.ResourceController.execute(ResourceController.java:88)
at hudson.model.Executor.run(Executor.java:123)
Finished: FAILURE
While we first suspected that there was an error running the p4 command on the remote machine, it turned out that p4 was not getting executed at all. What happened was, before restarting the node we had changed the .bashrc file and accidentally removed the location of our p4 executable from the path. Then, when the node was restarted the Hudson executor could no longer find the executable and thus failed with a very unintuitive message. (For some reason, specifying the explicit path to the executable via “Path to p4 executable” in the job config had no effect–see this JIRA issue) After fixing the PATH variable on the machine and restarting, our issue was resolved.
In general, you can check the value of the PATH variable, and other variables, on the Hudson nodes by going to Hudson » nodes » nodename and clicking on Log.

405 Error when deploying to Maven Repository

If you’re getting a 405 error when trying to deploy a file to your Maven repository, it’s because the URL (as in -Durl=http://host.com/repo) you have specified is somehow incorrect.

For example, I was trying to deploy a file using the mvn deploy:deploy-file target to a Nexus repository, and I got the following error:

$ mvn deploy:deploy-file -DgroupId=com.austje.test -DartifactId=project -Dversion=1.0 -Dpackaging=jar -Dfile=project.jar -Durl=http://repo1.austje.com/ -DrepositoryId=MyReleases
[INFO] Scanning for projects...
[INFO] Searching repository for plugin with prefix: 'deploy'.
[INFO] ------------------------------------------------------------------------
[INFO] Building Maven Default Project
[INFO]    task-segment: [deploy:deploy-file] (aggregator-style)
[INFO] ------------------------------------------------------------------------
[INFO] [deploy:deploy-file {execution: default-cli}]
Uploading: http://repo1.austje.com//com/austje/test/project/1.0/project-1.0.jar
[INFO] ------------------------------------------------------------------------
[ERROR] BUILD ERROR
[INFO] ------------------------------------------------------------------------
[INFO] Error deploying artifact: Failed to transfer file: http://repo1.austje.com//com/austje/test/project/1.0/project-1.0.jar. Return code is: 405
[INFO] ------------------------------------------------------------------------
[INFO] For more information, run Maven with the -e switch
[INFO] ------------------------------------------------------------------------
[INFO] Total time: 1 second
[INFO] Finished at: Mon Jan 25 11:15:25 CST 2010
[INFO] Final Memory: 5M/9M
[INFO] ------------------------------------------------------------------------
Looking at the line Uploading: http://repo1.austje.com//com/austje/test/project/1.0/project-1.0.jar, it’s pretty obvious that my url is wrong–that’s not where the artifact should be uploaded at all. Turns out I gave the repository server, but not the actual repository url! Changing my url parameter to reflect this

$ mvn deploy:deploy-file -DgroupId=com.austje.test -DartifactId=project -Dversion=1.0 -Dpackaging=jar -Dfile=workingTest.zip -Durl=http://repo1.austje.com/nexus/content/repositories/my-repo/ -DrepositoryId=MyReleases
fixed the issue, and I was able to deploy successfully.
Of course, this is not the only way you could screw up the url parameter. Among many possibilities, one tricky one I’ve seen is using http instead of https as the protocol.
Extra tip: If you fix the URL and are now getting return code 401, your credentials are incorrect. Try fixing them in your settings.xml file. You can test the credentials by going to the Nexus GUI and logging in. If those work, and you’re still not able to deploy via the command line, make sure the <id> in your <server> section of your settings.xml matches the <id> in the corresponding <repository> element.